We've made it. It's the end of 2023 and as I reflect back, it was a good year for me. I had lots of crafting time and a couple of great travels. It's the last day of our December challenge at Die Cut Divas. Our challenge is
FLOWERS
Our sponsor this month is Altenew. They are generously providing our winner with a $50 gift certificate to their online store.

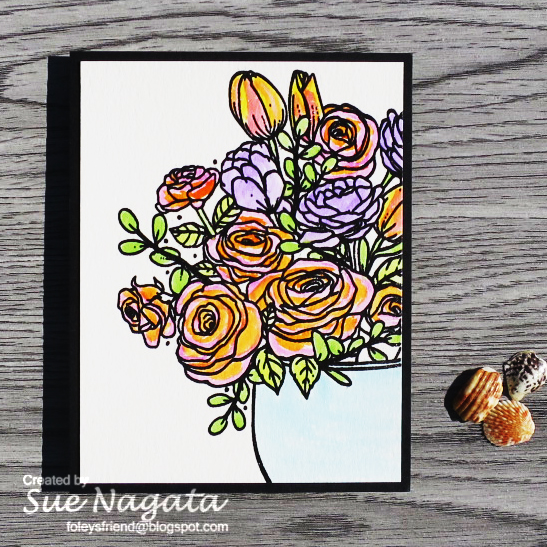
Here's my card

For my card, I used Altenew's Charming Doodles stamp set. It's a layered stamp set so you stamp the outlines (black lines) and stamp the solid colors as well. I used Versafine Onyx Black ink for the outlines and Hero Arts Passion Flower, Butter Bar, Pale Tomato, Moss, and Green Hills inks. With the coordinating Charming Dooles die set, the elements are all die cut out. I arranged the items on a white A2 card panel and glued them in place, popping up the red flower for a bit of dimension. For the sentiment, I used Altenew's Adore You stamp set and gold embossing powder (which doesn't photograph well). I trimmed the white panel down slightly and matted with black. To complete my card, I adhered the panel to a white A2 card base.
Hoping you have some time to craft today. We'd love to see your "FLOWERS" creations in our gallery.
Thanks for stopping by and Happy New Year to you and yours.
sue
This site uses cookies from Google to deliver its services and analyze traffic. Your IP address and user-agent are shared with Google along with performance and security metrics to ensure quality of service, generate usage statistics, and to detect and address abuse.