Wednesday 31 August 2022

Happy Little Stampers ~ September Watercolour Challenge

It's quite astounding that it's actually September. What happened to summer? It feels like it was just June. I think that I must have missed July and August. Nonetheless, it's time for our new challenge at Happy Little Stampers ~ Watercolour Challenge.
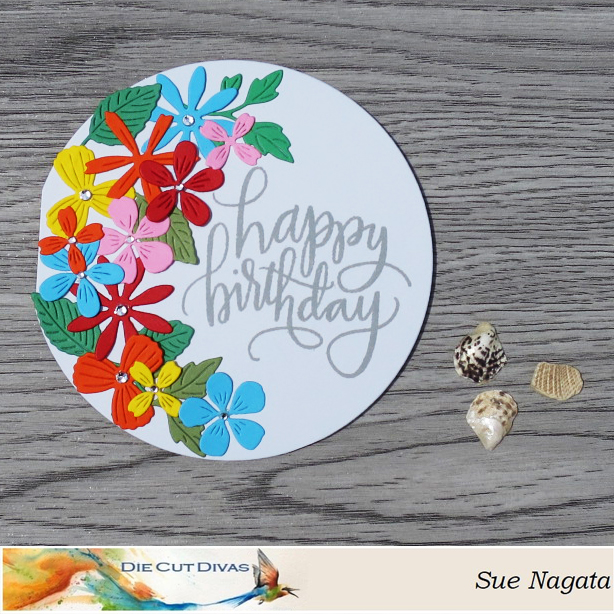
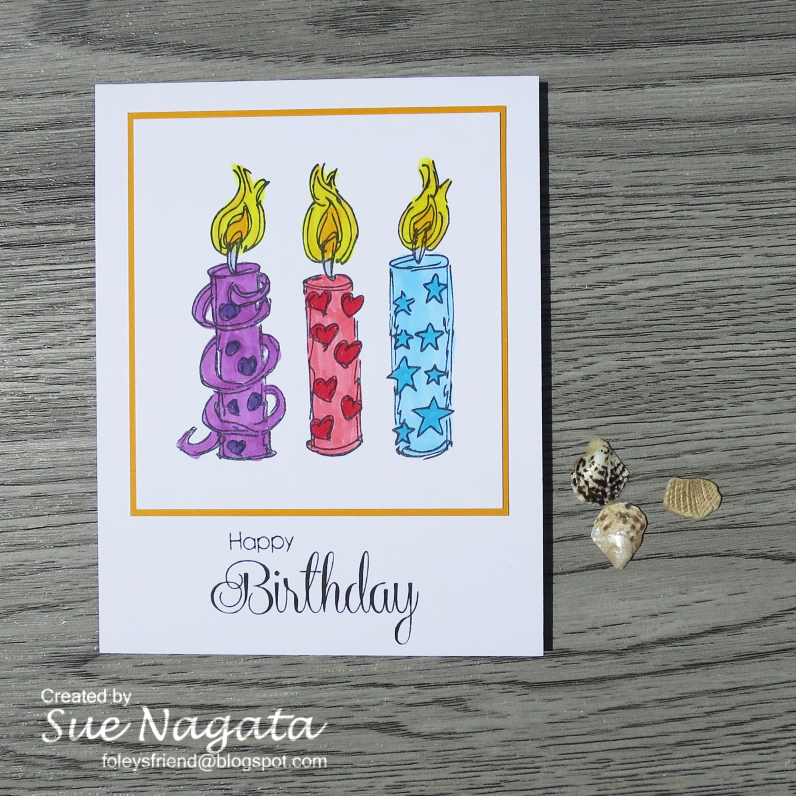

Here's my card


I was looking through Pinterest and with Google to find something different. Of couurse, I can't find my inspiration now. However, what I did basically is ink lift with a die cut. I'll start from the beginning. I started with an A2 panel of 96 lb bristol. I used the direct ink to paper method using Gina K Designs' Blue Denim, Blue Raspberry, Turquoise Sea. I then die cut with Memory Box's Zinnia Bouquet and some scrap white cardstock. I generously spritzed the die cut with water then applied it to the inked bristol. I then placed the panel and die cut in a copy paper folder (just a sheet of copy paper folded in half) and ran it through my die cut machine. I opened the copy paper folder and carefully removed the die cut, which had absorbed color from the inked bristol panel. The result is this "ghosted" look. Cool, eh? I trimmed the panel down and adhered it to a blue A2 card panel. For the sentiment, I used Clearly Besotted's Sentimental Type and die cut it using My Favorite Things Skinny Strips die set. I adhered the blue panel to a white card base to complete my card.

We'd love to see your watercolour creations. You don't need to be an artist whose works are displayed in the Louvre. If you are, fabulous. We're looking for creations where water is used. 

Thanks for stopping by
sue

This site uses cookies from Google to deliver its services and analyze traffic. Your IP address and user-agent are shared with Google along with performance and security metrics to ensure quality of service, generate usage statistics, and to detect and address abuse.

Shaped Card with Die Cut Divas ~ Last Day of our Challenge

It's the last day of our August Challenge at Die Cut Divas. Our challenge is SHAPED CARDS. We are sponsored this month by Poppystamps who will be giving our winner a $20 gift card to their store.


Here's my card


While it looks like a tag, it's a card. Here's a photo of it partially opened up.


I started by die cutting two tags using a STAMPlorations Stitched Tags die. The tag measures about 5 1/8" x 3", so it will still fit in an A2 envelope. I scored one tag, just below the hole and parallel to the bottom of the card using my Scor-Buddy. I adhered both tags to each other to form the card. On the top tag, I stenciled using Dana Wakley/Ranger's Plastic Canvas stencil and tumbled glass distress ink, applied with an oval ink blending brush to the central part of the tag. For the die cuts, I used Poppystamps Flower Field Corner die and many scraps of colored cardstock. I love the lines giving the die cuts more interest and dimension. For the sentiment, I used the same red and pink cardstock and Poppystamps Thank You Poe Script dies

There are still some hours left of our August Challenge. We'd love to see your shaped card in our gallery. 

Thanks for stopping by
sue

This site uses cookies from Google to deliver its services and analyze traffic. Your IP address and user-agent are shared with Google along with performance and security metrics to ensure quality of service, generate usage statistics, and to detect and address abuse.

Tuesday 30 August 2022

Addicted to Stamps and More! Challenge #437

To me, it felt like summer flew by. The first six months of the year seemed to plug away and take it's time. However, July and August have flown by. I'm hoping the hot temperatures cool down some. Although, it's a good excuse to stay indoors and craft (with a fan)!

We have a new challenge at Addicted to Stamps and More!


Here's my card


Let me start by saying, I love striped patterned papers. I have quite the collection. I did start this card though, by stamping the cute Santa with the sentiment using Sweet 'n Sassy Stamps Christmas Blocks stamp set with Memento Tuxedo Black ink. I added a bit of color with Copic markers - B60, E02, R37. I used a Sizzix circle die to die cut the image and sentiment. I found some textured, tone-on-tone dark green paper that matched one of the stripes of my striped patterned paper. I used the green paper to make a tag with Stampin' Up's Ornate Tag Topper punch. I found some silver plastic ribbon for the tag and adhered the tag to the striped paper at an angle. I adhered the panel to a white card base to complete the card.

We'd love to see your Christmas cards in our gallery. It's not too early to start on those cards!

Thanks for stopping by
sue

This site uses cookies from Google to deliver its services and analyze traffic. Your IP address and user-agent are shared with Google along with performance and security metrics to ensure quality of service, generate usage statistics, and to detect and address abuse.

Thursday 25 August 2022

Less is More Challenge #471 - Favourite Flower

It's nice when I'm caught up on my to-do list and have some time to sit and craft. I haven't been participating in card making challenges for quite some time. It's nice to be able to join back in. This time, I'm playing with the designers at Less is More where their challenge is


Here's my card


For my one-layer card, I used a stamp from Altenew's Everlasting Happiness stamp set, which I stamped with Memento Tuxedo Black ink on a white A2 card base made from 100 bl Cougar cardstock. I added color with Copic markers - G94, R35, Y38, YG63. For the sentiment, I used Hero Arts Color Layering Fuchsia stamp set, stamped with Hero Arts Field Greens ink.

There is something very calming about a clean and simple card.

Thanks for stopping by
sue

This site uses cookies from Google to deliver its services and analyze traffic. Your IP address and user-agent are shared with Google along with performance and security metrics to ensure quality of service, generate usage statistics, and to detect and address abuse.

Tuesday 23 August 2022

Time Out Challenge #220 - Make Your Own Background

It has been some time since I've been organized enough to participate in card challenges in places where I'm not on the Design Team - LOL! I had some time to craft and found the current challenge at Time Out Challenges


Here's my card


When I saw the challenge of "Make Your Own Background", I thought of Concord & 9th's turnabout products. For this card, I chose Concord & 9th's Summer Blossoms Turnabout Stamp Set that we received as part of Concord & 9th's 2022 Summer Camp. I used Concord & 9th's inks - Aqua Sky, Sprout, Buttercup and Honeysuckle. Using the Concord & 9th's Turnabout system, it's so easy to create a colorful background like this one. For the sentiment, I used Unity Stamps Say It Big dies and PhotoPlay's SCT Exclusive Birthday stamp set. 

It's been fun to join you at Time Out Challenges. Hope to find some more crafty time to join you again.

Thanks for stopping by
sue

This site uses cookies from Google to deliver its services and analyze traffic. Your IP address and user-agent are shared with Google along with performance and security metrics to ensure quality of service, generate usage statistics, and to detect and address abuse.

Atlantic Hearts Sketch Challenge #487

It's so easy to lose track of the days when you're retired. It's like everyday is the weekend! So, I kind of missed that yesterday was Monday and I didn't post my card for the new challenge at Atlantic Hearts Sketch Challenge


Here's my take on the sketch


I started this card by choosing Stampin' Up's Cherry On Top Designer Series Paper Stack in 6x6. I chose five patterned papers, one for each element of the card sketch. I felt I needed to mat with gray, each element, except the sentiment to help separate all the patterns. I used a Sizzix circle die and a Spellbinders Scalloped Circle die for the top layer (not including the sentiment strip). For the sentiment, I used Clearly Besotted's Sentimental Type stamp set. I felt the card was busy enough, so I didn't include the element hanging from the sentiment strip of the sketch.

There is still lots of time for you to add your card, inspired by our sketch to our gallery.

Thanks for stopping by
sue

This site uses cookies from Google to deliver its services and analyze traffic. Your IP address and user-agent are shared with Google along with performance and security metrics to ensure quality of service, generate usage statistics, and to detect and address abuse.

Try Stampin' On Tuesday ~ Challenge #570

Happy Tuesday! It's time for a new challenge at Try Stampin' On Tuesday. Here's our sketch for the next fortnight

Optional Theme: Bugs
Here's my card


As you can tell, I flipped the sketch upside down. For my card, I went through my stamp collection and found my Your Next Stamp's Bitty Bugs stamp set. I stamped with Memento Tuxedo Black ink, these three cute bugs on white cardstock, leaving a bit of space between them because I knew I'd be cutting the cardstock into small squares. I added color to the images with Copic markers - BG10, BV02, BV13, C5, R35, V12, V15, YG03, YG06. I then cut the images into 1 1/4" squares. For the light green panel, I embossed using Provocraft Cuttlebug's Victoria embossing folder. I liked the foliage of the embossing folder. I felt it appropriate for the bug theme. For the sentiment, I used the same stamp set and die cut the sentiment with an Echo Park Stitched Oval Nesting die from the die set. I adhered all the elements onto a light gray A2 card panel which was then adhered to a white A2 card base to complete my card.

We'd love to see how you're inspired by our sketch by joining our gallery.

Thanks for stopping by
sue

This site uses cookies from Google to deliver its services and analyze traffic. Your IP address and user-agent are shared with Google along with performance and security metrics to ensure quality of service, generate usage statistics, and to detect and address abuse.

Saturday 20 August 2022

Addicted to CAS ~ Challenge #227

How are you doing? Hoping you're finding time to craft. I love crafting - it's relaxing, enjoyable. It's great alone time for an introvert!

We have a new challenge for you at Addicted to CAS. For the next fortnight, our challenge will be


Here's my card


For my one layer card, I started by making a circle mask using a large post-it note and a Sizzix circle die. I centered the mask horizontally on my white A2 card base, more towards the top. I then used STAMPlorations' Dots All Over stencil and PinkFresh Studio's Sparkling Rose ink which I ink blended with an oval ink blending brush. I removed the stencil, but not the mask, and ink blended PinkFresh Studio's Ballet Slipper ink with an oval ink blending brush. I then stamped the silhouette using Stampin' Up's Serene Silhouettes stamp set and Versafine Onyx Black ink. I removed the post-it mask. For the sentiment, I used Clearly Besotted's Sentimental Type stamp set and PinkFresh Studio's Sparkling Rose ink. 

We'd love to see how you're inspired by our code word "PINK" and are looking forward to seeing your creations in our gallery.

Thanks for stopping by
sue

This site uses cookies from Google to deliver its services and analyze traffic. Your IP address and user-agent are shared with Google along with performance and security metrics to ensure quality of service, generate usage statistics, and to detect and address abuse.

Tuesday 16 August 2022

Addicted to Stamps and More! Challenge #436

Hi Crafty Friends! It's time for a new challenge at Addicted to Stamps and More! For the next fortnight, our challenge will be


Make Your Mark challenges mean using paint, ink, markers, colored pencils, pastels - anything that makes a mark! Here's my card


I started this card by inking up some 140 lb Strathmore watercolour paper with Zig Clean Color Real Markers - Orange, Pink, Red. I scribbled the colours randomly on the watercolour paper and then spritzed generously with water so that the colours blended. I let the watercolour paper dry naturally. It ended up a bit warped so I placed it under some heavy books and that flattened it out quite nicely. I then die cut the watercolour paper with Simon Says STAMP's Butterfly Tendrils die. I felt that the colours would pop best o a black background. For the sentiment, I used Simon Says STAMP's Furry Cat and Box stamp set and WOW's Rose Gold embossing powder on black cardstock. I used a Sizzix circle die to die cut the sentiment. To make the sentiment circle pop against the black background, I die cut a scrap of white cardstock with a Spellbinders Scalloped Circle Small Die as used it as a thin white scalloped background for the sentiment circle. I liked the way the thin scalloped circle looked behind the sentiment circle so I decided to trim down the panel that the die cuts were going to be attached to and cut a white rectangle, to create a thin white border. I adhered the elements to the central black panel, which was glued to the white rectangle, which in turn was adhered to a black A2 card panel. As a final step, the black A2 card panel was glued to a white A2 card base. 

We'd love to see how you make your mark this fortnight. Please add your creations to our gallery.

Thanks for stopping by
sue

This site uses cookies from Google to deliver its services and analyze traffic. Your IP address and user-agent are shared with Google along with performance and security metrics to ensure quality of service, generate usage statistics, and to detect and address abuse.

Sunday 14 August 2022

Perfectly CAS ~ Challenge #30

Are you ready my clean and simple card people? We have a new challenge at Perfectly CAS


Certainly emboss could mean use an embossing folder or it could mean use embossing powder and a heat tool. Here's my card


Obviously, I chose the embossing powder/heat tool option. I used PinkFresh Studio's Butterfly Garden stamp set, die and layering stencils. I started by stamping and heat embossing the image with gold embossing powder which I heat set. I then added color with the coordinating layering stencil and PinkFresh Studio's sparkling rose, raspberry bliss and bubble gum inks and Hero Arts' lime green and green hills inks, applied with oval ink blending brushes. I then die cut the image with the coordinating die. I heat embossed the sentiment using Paper Smooches' Salutations stamp set and gold embossing powder on a strip of light pink cardstock. I adhered everything to a light gray A2 panel which was then glued to a white A2 card base to complete the card.

Of course, you can use both types of embossing as long as you cover less than 1/3 of your card panel. That's our rule, cover less than 1/3 of the card panel. We'd love to see your "emboss" project in our gallery.

Thanks for stopping by
sue

This site uses cookies from Google to deliver its services and analyze traffic. Your IP address and user-agent are shared with Google along with performance and security metrics to ensure quality of service, generate usage statistics, and to detect and address abuse.

Tuesday 9 August 2022

Try Stampin' On Tuesday ~ Challenge #568

It's Tuesday so it must be time for a new challenge at Try Stampin' On Tuesday. Our challenge for the next fortnight is a sketch challenge

Optional theme: Checker/Gingham
Here's my card


I started my card by inking up the Echo Park Always & Forever stencil on a white A2 card panel with distress inks (seedless preserves, picked raspberry, speckled egg) applied with oval ink blending brushes. I cut the panel down to 2 3/4" x 4 1/4". I checked my stash for papers that went with the ink blended colors and what do you know, I couldn't find anything. So I decided to "make" my own colored paper. I ink blended some white cardstock with seedless preserves and an oval ink blending brush. I used it to make the fish-tail banner and the three half circles (actually, I used a 3/4" circle punch to cut these out). For the sentiment, I used My Favorite Things Blissful Butterflies stamp set and Gina K's Soft Stone ink, stamped on a scrap of white cardstock. I used a Sizzix circle die to die cut the sentiment out and ink blended along the edges with speckled egg distress ink and an oval ink blending brush. I adhered everything to a light gray A2 card panel and then adhered it to a white A2 card base to complete my card.

We'd love to see how you're inspired by our sketch by adding your card to our gallery.

Thanks for stopping by
sue

This site uses cookies from Google to deliver its services and analyze traffic. Your IP address and user-agent are shared with Google along with performance and security metrics to ensure quality of service, generate usage statistics, and to detect and address abuse.

Die Cut Divas ~ Poppystamps Circle Card

Our challenge for the month of August at Die Cut Divas is

SHAPED CARDS

This month, our sponsor is Poppystamps. They will be giving our winner a $20 gift card to their shop.

Here's my shaped card


For sure, I make mostly A2 cards. So this challenge makes me work outside my comfort zone. To start, I made the card using light gray cardstock and a Sizzix circle die. I folded the cardstock, like a regular A2 card and die cut, making sure that a portion of the die extended beyond the fold (i.e. wouldn't be cutting anything, but would be where the fold of the card is located). I stamped the large sentiment using Simon Says STAMP's Big Scripty Greetings stamp set and Gina K's soft stone ink. I added the flowers and leaves die cut using Poppystamps Potpourri Flower Die Set and Orchard Leaves Die Set and scraps of colorful cardstock. I arranged them and adhered them to the card. I added some adhesive rhinestones in the centers of the flowers for a bit of sparkle. 

We'd love to see your shaped cards in our gallery this month.

Thanks for stopping by
sue

This site uses cookies from Google to deliver its services and analyze traffic. Your IP address and user-agent are shared with Google along with performance and security metrics to ensure quality of service, generate usage statistics, and to detect and address abuse.

Monday 8 August 2022

Atlantic Hearts Sketch Challenge #485

Well, it's at least still Monday, here on the West Coast. Two weeks ago, I was a bit late! Oops. It's time for a new challenge at Atlantic Hearts Sketch Challenge. Here's our sketch


Here's my card


I turned the sketch into a Birthday card. I chose some festive patterned papers for the background and the vertical strip. They are both from the same 6x6 paper pack so the colors matched. For the tag, I used some blue cardstock and Stampin' Up's Ornate Tag Topper Punch. I stamped the sentiment using Simon Says STAMP's Furry Cat & Box stamp set and Gina K's Red Hot ink. I dusted off my Creative Memories Oval custom cutting system to cut the sentiment oval. I thought I add some balloons, die cut using Paper Smooches' Balloons dies and scraps of cardstock. I added silver thread for the balloons strings and a silver bow for the top of the tag. I adhered all the pieces to a light kraft A2 card base to complete my card.

We'd love to see how you're inspired by this week's sketch.

Thanks for stopping by
sue

This site uses cookies from Google to deliver its services and analyze traffic. Your IP address and user-agent are shared with Google along with performance and security metrics to ensure quality of service, generate usage statistics, and to detect and address abuse.

Saturday 6 August 2022

Happy Little Stampers ~ August Stencil Challenge

The world of stencils for cardmaking is exploding with possibilities. It used to be (and in many cases still is), you used a stencil, with primarily one color to achieve some design. However, with companies like PinkFresh Studio, Pretty Pink Posh, Taylored Expressions, there are layering stencils. These layering stencils permit the addition of typically more than one color (one color per stencil) to add more interest or more detail to the image. 

We have a new challenge starting at Happy Little Stampers ~ Stencil Challenge


Here's my card


OK - so the use of stencils isn't prominent on my card. However, see that little bouquet of flowers? It was created with layering stencils. I used PinkFresh Studio's Whimsical Blooms layering stencils and matching die. I added color with distress ink (spun sugar, abandoned coral, dried marigold, fossilized amber, mowed lawn) applied with oval ink blending brushes. With the layering stencils, typically, there is no masking. It's usually one layer, one color. For the background, I used PinkFresh Studio's Geo Arch Hot Foil Plate, not to hot foil (I don't have the necessary equipment). However, I used it to emboss a white A2 card panel. I then lightly ink blended with tumbled glass distress ink applied with an oval ink blending  brush to help accentuate the ridges. For the sentiment, I used Paper Smooches Salutations stamp set. I stamped on light gray and cut it to form a strip. I glued the pieces together and adhered the panel to a white A2 card base to complete my card.

We'd love to see your stencil creations in our gallery this month.

Thanks for stopping by
sue

This site uses cookies from Google to deliver its services and analyze traffic. Your IP address and user-agent are shared with Google along with performance and security metrics to ensure quality of service, generate usage statistics, and to detect and address abuse.

Addicted to CAS ~ Challenge #226

There is a new challenge starting at Addicted to CAS. For the next fortnight, our challenge is


Here's my card


For my card, I used Sunny Studio's Radiant Plumeria stamp set and matching dies. The stamp set is a layering stamp set, meaning that there are multiple stamps which get stamped "on top of each other" with different colors to add interest, shading and dimension to the images. I used Hero Arts inks (pine, field greens, grape juice), PinkFresh Studios inks (ballet slipper, sparkling rose) and  Gina K ink (wild lilac). I then die cut the images. I stamped the sentiment using Simon Says STAMP's Flower Friend stamp set with Gina K's soft stone ink. I then die cut it using a My Favorite Things stitched circle STAX die. I adhered the flower, leaves and sentiment circle to a light kraft A2 card panel, which was then adhered to a white A2 card base to complete the card. 

We'd love to see how you're inspired by the word "tropical". Please remember to keep you creations clean and simple.

Thanks for stopping by
sue

This site uses cookies from Google to deliver its services and analyze traffic. Your IP address and user-agent are shared with Google along with performance and security metrics to ensure quality of service, generate usage statistics, and to detect and address abuse.

Thursday 4 August 2022

Happy Little Stampers ~ August Christmas Challenge

Wow, it's hot outside. It's nice to think about Christmas. I find it cooling - LOL! We have a new challenge at Happy Little Stampers ~ Christmas Challenge.


Here's my card


For my card, I used Simon Says STAMP's Winter Floral stencil. I added color with distress inks (candied apple, speckled egg, twisted citron) and oval ink blending brushes. I masked off areas where I didn't want the color to spread with torn pieces of post-it notes. I didn't want to cover the stenciled areas, so I chose to heat emboss the sentiment using The Ton's Holiday Flourish stamp set and gold embossing powder on a strip of vellum. I adhered the vellum to the card panel and then adhered the panel to a white A2 card base to finish off the card.

We'd love to see your floral Christmas cards.

Thanks for stopping by
sue

This site uses cookies from Google to deliver its services and analyze traffic. Your IP address and user-agent are shared with Google along with performance and security metrics to ensure quality of service, generate usage statistics, and to detect and address abuse.

Tuesday 2 August 2022

Addicted to Stamps and More! Challenge #435

Hello Crafty Friends! How are you doing? I love having time to play with paper. We have a new challenge for you at Addicted to Stamps and More!


Have you heard of PinkFresh Studio? They hold online Create & Connect cardmaking events where for a fee, you receive a box of goodies, many not yet released and then for one weekend, you attend virtual classes using those goodies. I feel that they are worth the price tag. Also, I don't have to travel somewhere - pay for travel and hotel to attend classes. Since the classes are virtual, they can be re-watched at one's leisure. They are a brilliant way to take classes and receive new product. I took their spring class and we received their Handpicked Flowers stamp set, die and layering stencils. Their layering stencils make adding color so easy.

Here's my card


I started by stamping the image on white cardstock. I added color with the layered stencils and distress inks (spun sugar, dried marigold, carved pumpkin, twisted citron, abandoned coral, peeled paint) applied with oval ink blending brushes. I then used the coordinating die to die cut the image. I adhered it to a green A2 card panel. For the sentiment, I stamped it using Clearly Besotted's Sentimental Type on white cardstock with Versafine Onyx Black ink. I die cut the sentiment using My Favorite Things' Skinny Strips Die-namics. I adhered the sentiment to the panel and then adhered the panel to a white A2 card base to complete my card.

We'd love to see your stencil &/or die cut creations in our gallery.

Thanks for stopping by
sue

This site uses cookies from Google to deliver its services and analyze traffic. Your IP address and user-agent are shared with Google along with performance and security metrics to ensure quality of service, generate usage statistics, and to detect and address abuse.

Happy Little Stampers ~ August Birthday Challenge

We're mixing things up a bit at Happy Little Stampers. We've changed our Clean and Simple Challenge to a Birthday Challenge. I mean, I always am looking for birthday cards and I'm guessing that I'm not alone.

So, welcome to our first Birthday Challenge - ANYTHING GOES! Our challenge will always be ANYTHING GOES so that you can stock up on whatever type of birthday card you need.

Here's my card


I figured it was a good time to use the Rubbernecker Stamps Candle Set stamp that I haven't used yet. I love how whimsical the candles are. I stamped the image with Memento Tuxedo Black ink and added color with Copic markers - B12, BG05, C3, R22, R29, V06, V17, Y06, Y15, Y17. I trimmed the panel to 3.5" x 3.75" and matted with a yellow/orange cardstock. The sentiment uses Simon Says STAMP's It's Your Birthday stamp set and was stamped with Versafine Onyx Black ink.

We'd love to see your birthday creations in our gallery.

Thanks for stopping by
sue

This site uses cookies from Google to deliver its services and analyze traffic. Your IP address and user-agent are shared with Google along with performance and security metrics to ensure quality of service, generate usage statistics, and to detect and address abuse.